Welcome to our free Tips section. Below are some links about upholstery tips on how to do some upholstery works.
How to Upholster a headBoard
By B. E. Conrad
http://www.doityourself.com/stry/upholsteraheadboard
Nothing adds a fresh new look to a bedroom quite as much as a beautifully upholstered headboard. Upholstering that worn out or bad looking headboard is a great way to bring new life and new style to virtually any bedroom, and a great way to start any bedroom remodeling project.
Before starting to upholster the headboard, it's a good idea to look around the room for a good theme. You'll want to try to match the fabric you choose to the existing draperies, wallpaper and other features of the room, in order to achieve a uniform look and feel.
It is also important to gather the tools you will need to complete the job before getting started. Among the supplies needed to successfully complete such a project are the following:
Tape measure
Two-inch foam
Circular saw or handsaw
Portable jigsaw
Fiberfill batting
Sandpaper
1/4" plywood
Several large pieces of paper
Upholstery fabric
Utility knives
Staple gun with 1/4" staples
Velcro tape
Scissors
Paint brushes
1. When getting started, the first step is to carefully measure the area to be upholstered. In some cases the headboard will have posts which frame the sides, while others will have a recessed panel which is framed on the top and sides with molding. Make sure you have enough foam, batting, and plywood to cover the area to be upholstered.
2. After the area has been measured, create a template using heavy duty paper. The sheets of paper can be attached to the headboard using tape, and the pieces can be taped together if necessary. Trace the curves by pressing the paper near the edge, then marking it using a pencil.
3. With the template prepared, the next step is to cut the plywood. Place the template over the plywood and then tape into place. Trace the edge of the template on the plywood, and then cut the plywood. If the fabric to be used is very heavy, it can be cut just inside the line. A circular saw or handsaw can be used for straight cuts, while a portable jigsaw can be used for curves. After the cut has been made, test the fit, making sure to leave enough room for the fabric and batting to wrap around the edges.
4. The next step is to cut the padding by lying the plywood backer on top of the foam. The foam can be compressed by kneeling on the plywood form on top of the foam, then cutting it with a sharp utility knife. The plywood form can also be used as a template when cutting the fiberfill batting, but when cutting the batting an additional two to three inches of extra batting should be allocated, in order to allow it to wrap around the backer panel.
5. Once the cuts have been made, it is time to install the fabric. The fabric should be laid out on a clean surface with the good side down. After the fabric is in place, place the batting and the foam on top of it, followed finally by the plywood backer. If the upholstery pattern is horizontal or vertical, be sure that it will properly align with the sides and the bottom edge of the backer.
6. The fabric should be folded over the back of the backer and then stapled in place, using 1/4" staples at 2 inch intervals. Begin with a few staples in the center of the opposite two sides, then a few in the top and bottom, working your way out from the center and alternating sides from top to bottom. Any excess batting and material can then be trimmed away using a sharp utility knife.
7. The final step is to install the newly upholstered panel by attaching self-sticking Velcro strips to both the headboard and the corresponding spot on the back of the board. Staples can be added for additional holding power to both the backer and the headboard. The panel can then be pressed into place, and the only thing remaining is to stand back and
HOW TO INSTALL A ZIPPER IN A PILLOW.
http://www.upholster.com/howto/pillzip.html
Cut your zipper length about 1-2" from pillow plate corners. We use #4 aluminuim chain zipper. Put the slide on the proper end. Fold a piece of pillow fabric and sew far enough back across it to leave a small pocket to hide the zipper slide when the pillow is closed. Sew another fabric tab across the other end of the zipper.
Skip this step if your pillow has no welt. Center zipper piece to pillow plates. Start sewing at the plate's corner and the center of the fabric tab, expanding outward as you approach the zipper. Then sew as close as you can to both the zipper teeth and the welt cord.
Next fold fabric 1/2" and top stitch the other pillow plate to the zipper. Try to cover at least half the zipper teeth. You shouldn't be able to see any of the zipper at this point. If you don't have welt cord on your project, sew both plates in the same manner. Back stitch or sew twice at the beginning and ending corners as you learned in "Cutting and Sewing Basics".
Try to use a thread color that blends with your fabric. The better you can hide the zipper the more you'll avoid the "why didn't you use a colored zipper?" complaint.

HOW TO HAND SEW
http://www.upholster.com/howto/handsew.html
The simple technique shown here is one of the most versatile sewing methods that upholsters use. With it you can close pillows and cushions, make repairs, sew down outside arms and backs, and cover some of your goofs. You'll see other sewing methods where we install seats and so on, in later segments.
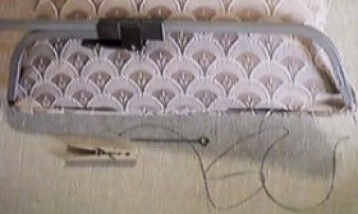
Here we're using a cushion stretcher, or cushion equalizer. It's adjustable and locks in place making our job much easier. You can also use upholsterers pins, or that expensive tool, the clothes pin. I'm using a 3 1/2" curved needle and nylon hand sewing twine for this job. I'll use black thread so you can see me working and also so you can see that when this done right, the thread doesn't show anyway (maybe they should teach this in medical school). For light weight fabrics use a thinner, smaller needle and thinner but strong sewing machine thread. Also, it's a good idea to have marked the center of the plates to help you keep them aligned.
Tie a knot in the end of the twine and thread needle. Start by going inside the pillow to the right so as to lap the sewing machine stitch. See above photo.
Next take about a 1/2" bite through the welt fabric, less for lighter weight fabric. Avoid going into the cord itself. Pull tight.
Hold your thread straight up and down to determine where your needle should enter the upper plate. Continue this method untill you've lapped the spot you sewed on your machine. If it looks as if the top plate, for example, is going to have more fabric than the bottom, then insert your needle a little to the left of normal on the top plate. This will help take up some of the slack.
When you're finished sewing wrap the twine around the needle a time or two and insert it into the pillow fabric or welt. Hold the thread snugly, close to the spot where the needle goes in. This will produce a knot which can stay inside the fabric keeping your work from coming loose. You'll usually hear a little popping sound when you successfully tug the knot into the right place. Cut off the excess twine.

